From the class folder in Box.com, download the folder Swing Tutorial Files - Download or Copy - DO NOT MOVE and save it on your personal computer or portable drive.
THESE NEXT STEPS ARE VERY IMPORTANT! YOU WILL HAVE LOTS OF PROBLEMS IF YOU DO NOT FOLLOW THEM EXACTLY.
GOT-YA: Some computers download the folder in the "zipped" compressed format (in the icon view, the folder appears with a zipper). Before you can proceed, right click on the folder and choose Extract or Unzip.
Find the folder you just downloaded and open it. Find the file named Swing Sweitzer CC.prproj. Select that file and rename it Swing YourLastName.prproj (Example: Swing Sweitzer.prproj).
If you can't rename the file, it's because it's still zipped. See GOT-YA above.
Double click on Swing YourLastName.prproj. Before it open completely you will see a window that tells you this project was created with a previous version of Premier Pro CC and it will ask you if you want to save it as a new file called Swing YourLastName CC_1.prproj choose OK and it should then open Premier and you can start editing. THIS IS THE FILE YOU WILL UPLOAD.
As the Demo is loading, you may get a dialog box titled Where is Rob Dialog. Navigate to the folder you downloaded from the J210 Box.com and open the Dance Shots folder and select Rob’s Dialog. Click on the Open and this will sync up all the shots you need for this assignment. At last, Premier opens with the files you will need for the Tutorial.
Choose File/New/Sequence and at the bottom of the window that opens, type Swing YourLastName and tap OK.
In the Sequence Window you should now have a blank sequence and new tab the says Swing YourLastName in addition to the tab for Swing Sweitzer. You can have several sequences open at the same time and move between them by clicking on the tab. You can even copy and paste clips and segments between sequences. If you're not sure what your project should look like, you can click on the tab for Swing Sweitzer to see my version of the assignment.
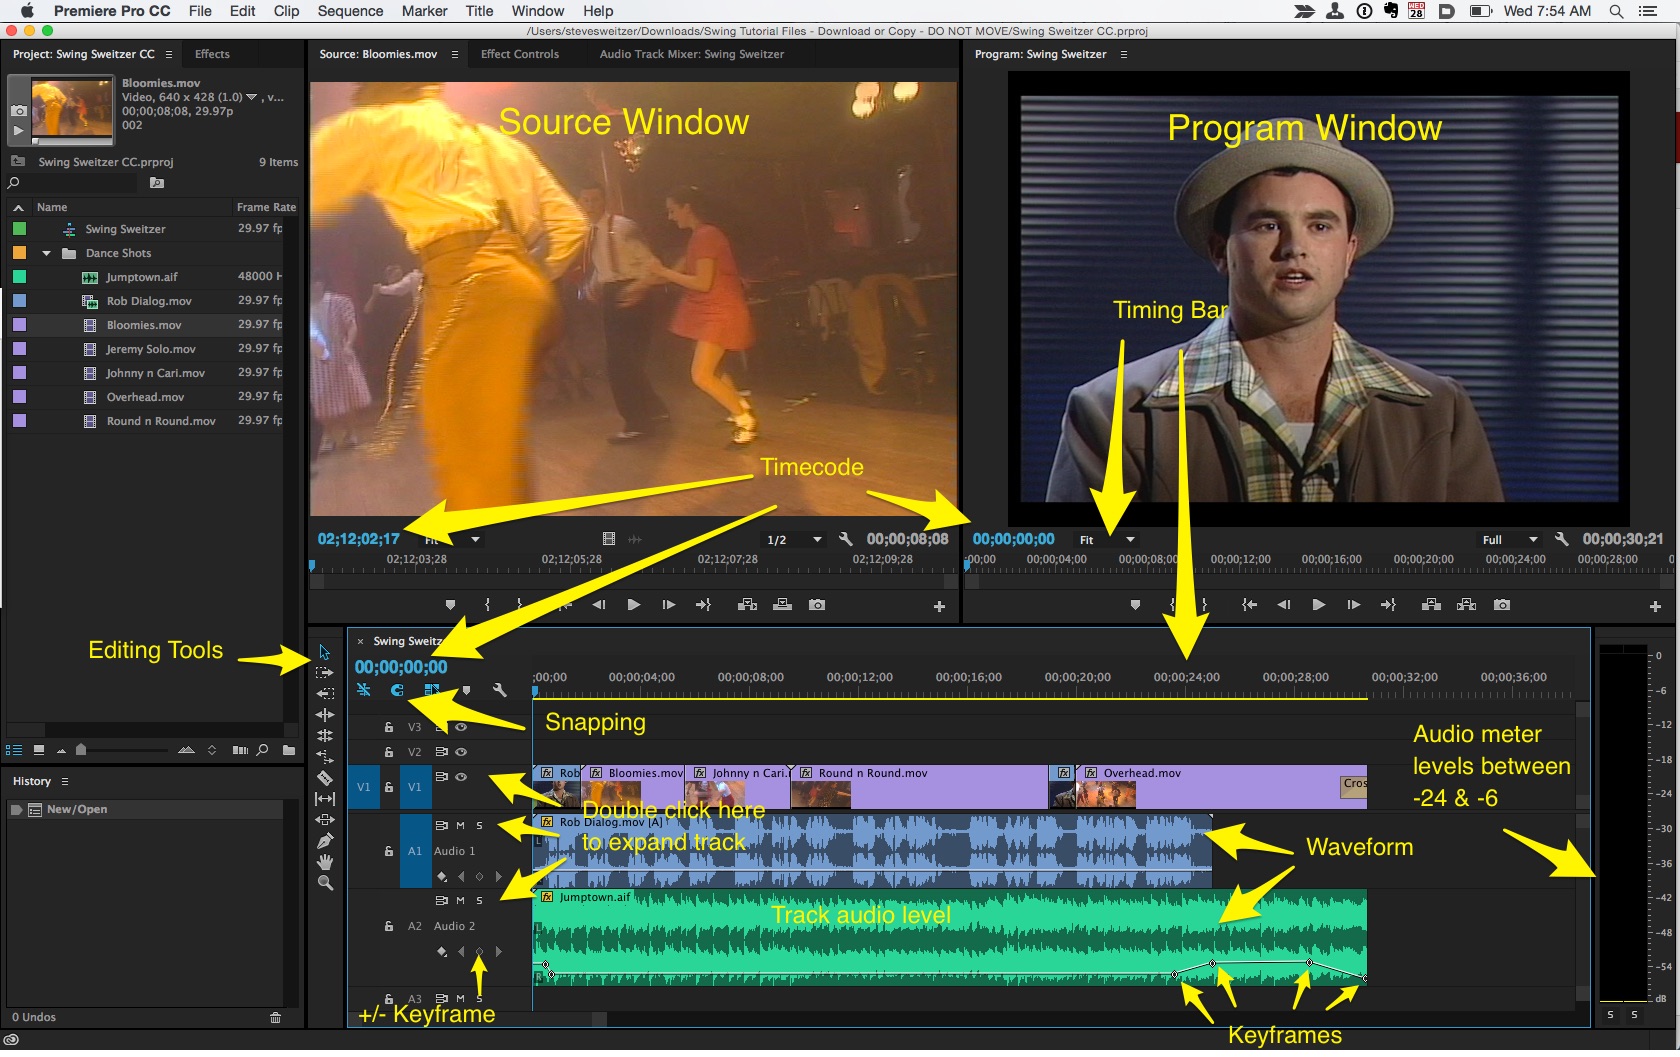
Getting Started
REMEMBER YOU CAN UNDO SOMETHING, JUST TYPE command Z – you can do this repeatedly to step back through your actions.
From the bin with the clips in it, double click the icon next to Rob Dialog to load it into the Source window and use the J, K and L keys to shuttle through it.
Add Rob Dialog to the timeline (just click on the video in the Source monitor and hold down the mouse as you drag it to the to the timeline.) You want your tracks on V1 and A1.
Alert: If you get a Clip Mismatch Warning, ALWAYS choose "Change sequence setting."
You should have one track of video and one track of audio. You may have to move it around a little in the timeline to get it on V1 and A1. Tap the \ key to get the clip to fill the timeline.
Expand A1 audio track so you can see the waveform. To expand it, double click your pointer next to the S on the A1 track.
You will generally want to edit with this view.
Now, let’s adjust the audio. Place the playhead at the beginning of the timeline and tap the Space Bar to play the track. Hit Space Bar again to stop the playback. While it is playing, notice that the audio level is bouncing in the red in the audio meter to the right of your timeline. We want our audio to be in the –6 to -18 range.
Hover your pointer over the line in the middle of audio tracks. When it is on top of the line, it will change to a - with an up and down arrow on it. While it is the - symbol, click on the line and hold your mouse down as you slowly drag down. You will see a number below the pointer. You want to drag until that number is between - 8:00 and -10:00. Play the track again. You have lowered the audio for the entire track.
Do a three point edit.
Place the playhead at the beginning of the timeline (tap the Home key if your computer has one or just drag the timing bar) and play the track until you hear Rob say “the Lindy Hop.” Press the Space bar when you hear “Hop” and that will stop the playback. Mark this as your “In” point with either the “In” button { or just tap “I” – you now have the first of the three points. It should be at about 00:00:01:24 in your timecode box.
Place the playhead at the beginning of the timeline and play the track until you hear Rob say “constantly moving.” Press the Space bar when you hear “constantly moving.” Mark this as your Out point with either the “Out” button } or just tap “O” – you now have the second of the three points. It should be at about 00:00:05:18 in your timecode box. Notice the area between the In point and the Out point is now highlighted to show what area is going to be effected by the edit.
Double click the filmstrip icon to the left of the “Bloomies” clip to load it - Source Window, upper left of the screen. Notice that there is now a blue line around the Source window - this indicates that this window is active. Tap the Home key to put the playhead at the beginning of the clip. Click on the blue numbers that say 02:12:02:17 (this is the the Playhead Position) and then type “shift +500“ in the window. When you hit Enter/Return the playhead should jump to timecode 02:12:07:17. Tap the “O” key to set the “Out” point. You now have the third point of the three point edit – (the In and the Out on the timeline and the Out in the Preview window timeline.) With this information, the computer can figure out the forth point of the edit which is the In point for the clip in the Preview window.
MAKE SURE THE SNAPPING OPTION TURNED ON. (Type S repeatedly and look for the little magnet icon in the upper left of the timeline. You want the the magnet to be blue to indicate that Snapping is on.)
Now, you’re going to “overwrite” Rob’s picture but leave his audio untouched. Chose the Overwrite icon or tap the “.” to overwrite Rob (see how the computer figures the 4th point of this edit. In the Fit Clip box that pops up, click Ignore Sequence In Point.)
Alert: If you see a Fit Clip dialog box, choose Ignore Source In Point.
Place the Playhead at the beginning of the clip in the timeline and play through the three point edit you just completed. Notice the Bloomies video has replaced the images of Rob talking but the audio track has remained unchanged.
Add Multiple Clips
Position the playhead at the end of the Bloomies clip in the timeline (use the up arrow and down arrow jump between edits in the timeline).
In the bin, click on Johnny n Cari and hold down the Command key (Control Key on a PC) and click on Round n Round. Both clips should be highlighted. Release the Camand key and then click on the icon for one and drag them to the end of Bloomies in the timeline and they should overwrite more of Rob’s face. Notice how they “snap” to the edit point? This is what “Snapping” does. It’s also worth noting that the clips appear in the order you selected them – if you had clicked on Round n Round first, it would appear before Johnny n Cari.
Add a clip at a specific timecode
Position your playhead at the beginning of the timeline and type 20:00 in the timecode field. When you hit the Return key, the playhead should jump to timecode 00:00:20:00.
Double click on the clip Overhead in the bin, to load it into the preview screen. Type “.” or drag the Overhead clip to the timeline to overwrite Rob’s face, starting at timecode 00:00:20:00. The Overhead.mov clip will continue on after the end of Rob’s audio.
Fine tuning
I will be checking each of these and deducting a point from your grade for each of these fine tuning points.
NOTE:
In the latest version of Premier they have changed the way to tool bar looks and behaves. Now, fewer tools appear but if you click and hold the the mouse on the tiny corner triangle you will get a break out menu showing other tools. The good news is that the keyboad shortcuts listed below still work for accessing the various tools.
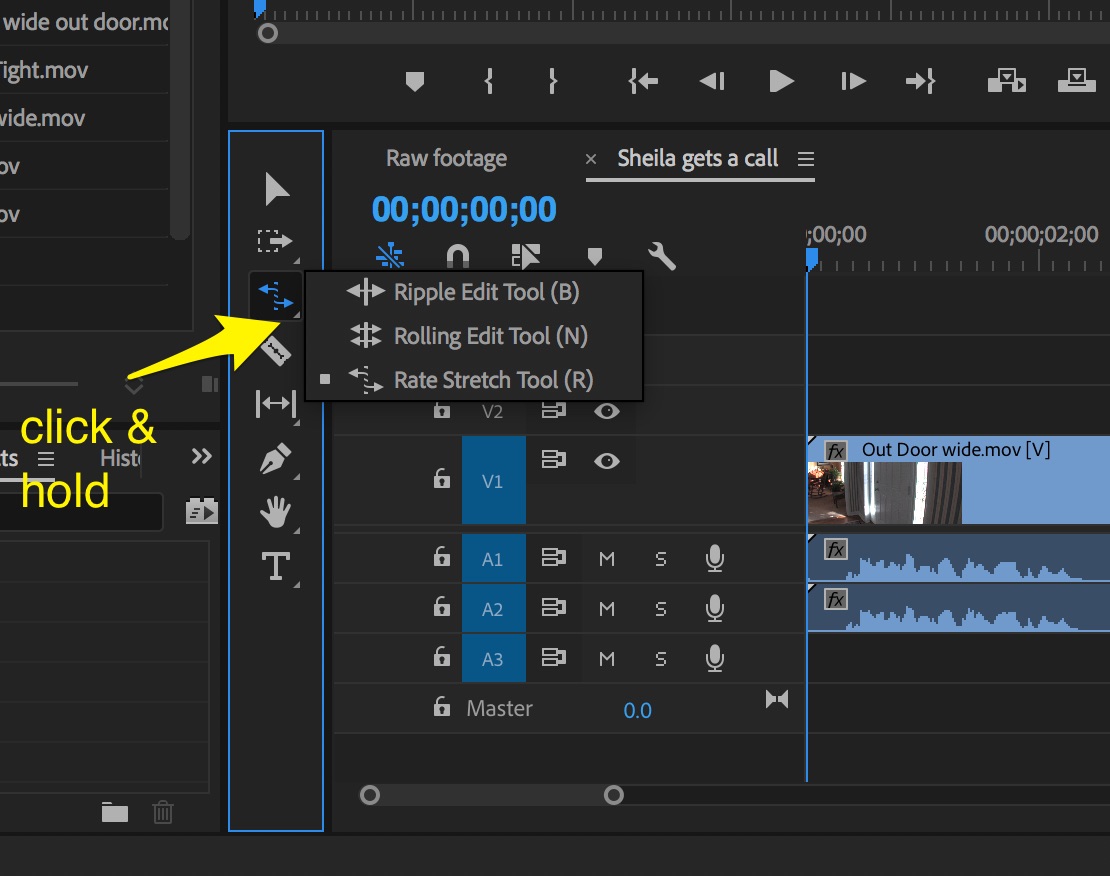
Slip Edit
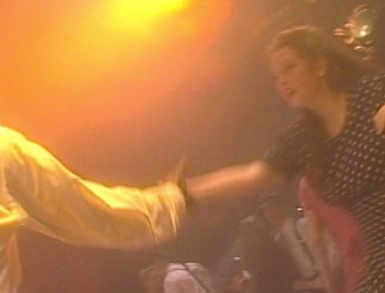
You’ll notice that the dancers aren’t holding hands at the beginning of the Bloomies clip. They don’t clasp hand until about 00:00:01:26. Click on the Slip tool the toolbox (or type Y). Hover the cursor (now a two headed arrow) over the Bloomies clip in the timeline. Click and hold the mouse as you drag to the left. You will see a box with numbers in it as you drag, you want to drag until they read -00:00:01:04.
Notice how the Program window shows several windows as you drag? The one on the bottom left is showing you the first frame of your clip – you want to drag until it looks like the picture above. The window on the right is showing you the last frame of the clip. Think of the Bloomies clip as a window in the timeline. You want to keep the window in the same place in the timeline and you want to keep it the same length, but you want to slip the clip behind the window (Bloomies video) to the left a little so the dancers are holding hands in the first frame of the clip (like the picture above).
When you finish with one of these specialized editing tools, you need to turn your cursor back into the Selection tool. You can click on the up arrow in the toolbox or type V.
Roll Edit
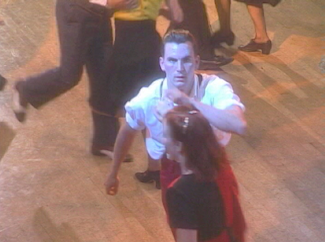
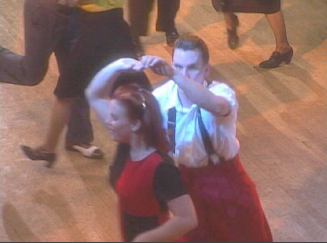
At the beginning of Johnny n Cari, notice that the dancer is looking at the camera; you are going to use the rolling edit tool to roll out the Bloomies footage (making that clip longer) until it covers the part of Johnny n Cari where the dancer is looking at the camera (making Johnny n Cari shorter.) You'll use the Rolling Edit tool from the toolbox, but it's hidden under the Ripple Edit toool. You can activagte it by typing N or hold down the Option/Alt key while clicking on the Ripple Edit tool. With the Rolling Edit tool active, hover the cursor over the edit point between the Bloomies and Johnny n Carie clips. Notice that the tool has a bar through it unless it is over an edit point. Click on the edit point between Bloomies and Johnny n Cari and drag to the right. See the gray box again? This time you want to drag to the right until the first number reads +00:00:00:26. Also note that the Source window shows two windows. The one on the left shows the last frame of Bloomies and the one on the right shows the first frame of Johnny n Cari.
Add and audio track and adjust it:
Double click on the Jumptown clip. Notice that only the waveform shows in the Source window. This is because this is an audio track without video. Now click on Jumptown and drag this down to the A2 track and let it drop there, with the beginning of the clip at the beginning of the sequence. Expand A2 audio track so you can see the waveform. Double click your pointer next to the S on the A1 track. (See the picture at the top of the tutorial for specifics).
Put your cursor at the beginning of the timeline and play. See how the audio meter on the right is constantly in the red – that means the music is over modulated and will be distorted if you leave it at that level. So, before we do anything else, we need to bring down the volume of the music for the whole track. Hover your cursor over the line between the L and R channels and drag it down until the number in the little gray window is between -14:00 and -20.00 dB. You should be able to hear Rob clearly with just a hint of music under his voice.
If you zoom in on your sequence (tap the + key to zoom in and the – key to zoom out), you‘ll see that there is a little time before Rob starts to talk. It would be great to have the music up full during this but if it continues at full volume, it drowns out Rob when he starts to talk. Move the playhead to the point on the timeline just before Rob starts to talk (about 00:00:00:16). Now, click on the diamond symbol (Add-remove keyframe) and you should see a small white dot on you timeline where the timing bar and the audio level intersect. (GOT YA: If nothing happens when you click on the keyframe button, it’s because the audio track isn’t selected. Click somewhere inside the green Jumptown.aif clip and it will turn dark green with gray waveform. Now you can add the keyframe.)
Tap the right arrow on your keyboard 7 times to move the playhead seven frames to the right. Click on the Add-remove keyframe button again to add another keyframe. Now, click on the first keyframe and drag up until the number in the gray window is about -6.00 dB – note that you can also drag the keyframe to the left or to the right if you wish to reposition it.
Hover the mouse over the end of the Jumpdown.aif clip in the timeline. Select the end of the clip and drag to the left. The clip should snap to the end of the Overhead clip so that both the video and audio in the timeline both end at the same place 00:00:30:21
Use two keyframes to bring the music back to full volume as soon as Rob quit talking. If nothing happens when you try to click on the Add-remove Keyframe button, be sure that you have clicked on the Jumptown clip in the timeline to activate it. Let it play for a few moments and then use two more keyframes to fade it to nothing at the end.
Finally, click on the end of the Overhead clip in the timeline and from the Sequence menu at the top of the screen, choose Apply Default Transition. This will add a Cross Dissolve that will fade the video to black
Submit the finished assignment.
When you have completed the assignment, go to the File menu and click on Save. Now, Quit Premier (Click Yes if it asks is you wish to save your work).
Open your browser and navigate to the Box.com J210 Spring 2017 folder and open it, then open the Video Tutorial Assignment folder.
Choose Upload File and navigate to the folder we downloaded, Swing Tutorial Files - Download or Copy - DO NOT MOVE, and select the file Swing YourLastName CC_1.prproj and upload it.
Your finished timeline should look like this.

| Grading Rubric | |
|---|---|
| A | 1 Editing point may be missed. |
| B | 2 - 3 Editing point may be missed. |
| C | 4 - 5 Editing point may be missed. |
| D | Project submitted but more than 5 editing points missed. |